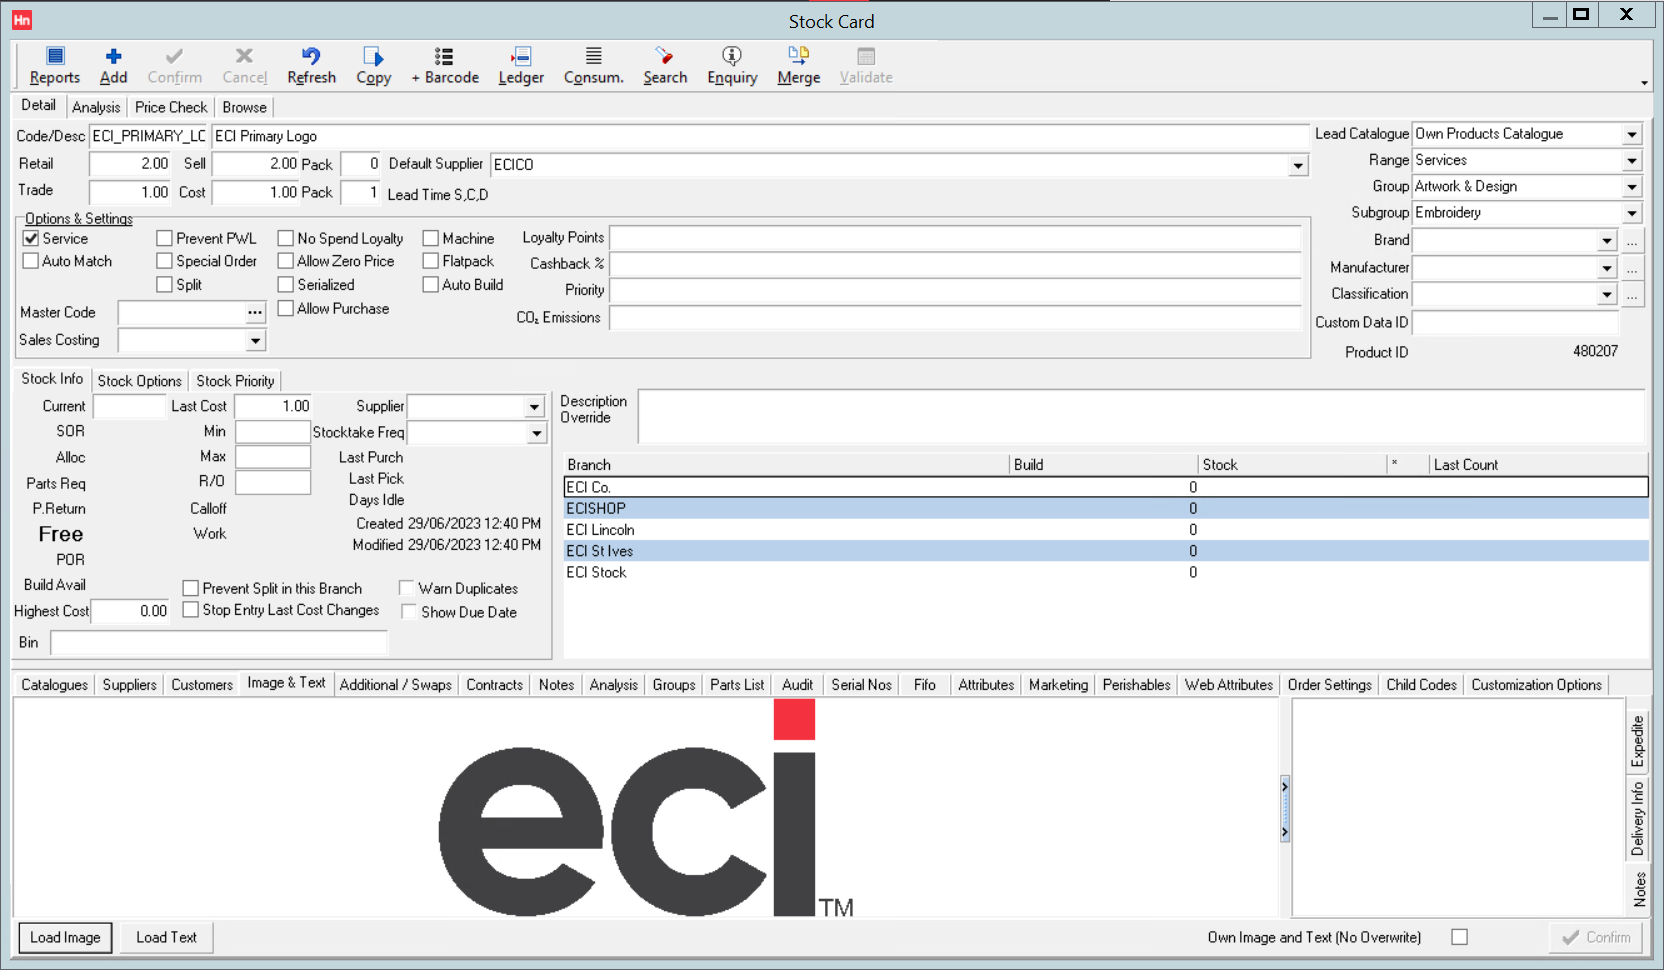
Logo Products are used in conjunction with HorizonWeb to let your customers order products customized with embellishments that are specific to that customer. A product should be created for each logo you want to offer to your customers. The logo products must exist in a Customer specific Customer logos catalogue.
Note: It is important that the catalogue is Customer specific, not Hide on web, but that its items are Hide on web.
- Create a JPEG version of the logo. The recommended maximum size is 200px on either dimension. The file extension must be .JPG.
Note: Solely changing the file extension to .JPG does not change the file type to JPEG. You must use an image editor (a free and open source example is GIMP) or an image converter (such as Adapter). These are only two examples, and there are many (both online and downloadable) products, with varying licence conditions, that can be chosen to do this job. Please speak to your own IT team to discuss what will work in your business.
- On the Stock menu, click Products. The Stock Card will open on the Browse tab.
- In the Stock Card toolbar, click Add. The Detail tab opens and focus moves to the Code box.
Note: If the Add button is unavailable, an Own Products Catalogue may not have been selected in Set-up > Company > Settings > General.
- Complete the mandatory boxes:
- Code – Item's code. An alphanumeric code, 30 characters max.
- Description – 150 character item description. This description is displayed on HorizonWeb, so could include details of the logo size, the placement or the type of embellishment.
- Retail – item's recommended retail price
- Sell –
- Trade – item's trade price
- Cost – item's cost
- Default supplier – Your company trader.
- Range – Services
- Group – Artwork and Design
- Subgroup – Design, Embroidery, Screens Plates etc or Unspecified.
- Under Options and Settings, click Service.
- Click Confirm.
- Under the Catalogues tab, right-click the item, and from the context menu, click Modify.
- In the Catalogue list, click the customer specific catalogue previously created.
- Check that Hide on Web is selected.
- In the Supplier list, click your company trader. Click OK.
- Click the Image and Text tab.
- Click Load Image.
- Browse to the JPEG file and click Open. The logo is displayed in the box.
- Repeat from step 3 for each logo.
- On the Set-up menu, click Catalogues, then under the Customer Specific tab, click the catalogue. Your logo products are listed in the bottom pane.


