The Required tab opens with the Standard tab selected by default. Click Groups to select what to shop for by user-defined groups:
- Create a user-defined products group designed to include, or exclude, the products for which you want to shop.
- On the Purchases menu, click Shopping.
- Click the Shop for option button and select what you want to shop for: Stock and orders, Orders, or Shop by van.
- Click Search.
- Click other Standard options to filter your shopping list further, then click Search.
- Click Groups, then Product.
- In the Include group, select the user-defined groups that contain products that you want to include in your shop.
- In the Exclude group, select user-defined groups that contain products that you want to exclude from your shop.
Note: If a product is in an Exclude group, then it will be excluded from your shop, even if it is in an Include group.
- Click Search. The product list will be amended accordingly.
-
In the Shopping toolbar, click Shop for Selected. A progress bar is shown below the list. When complete, the Shopping List tab opens. A list of orders that can be raised is displayed.
Note: At this point, no purchase orders have been created.
- Continue Shopping.
Using Robot to Shop by Product Group
Robot lets you automate tasks you undertake in Horizon. You can create templates – jobs that can be scheduled, and sent to a device or recipient. Templates can also be executed on demand using Template Wizard to automate a task, or test a template you have created for Robot.
To set up a Shopping template, which includes a product group:
- Follow steps 1-9 above. You are now ready to create a template for Robot.
- Click Store.
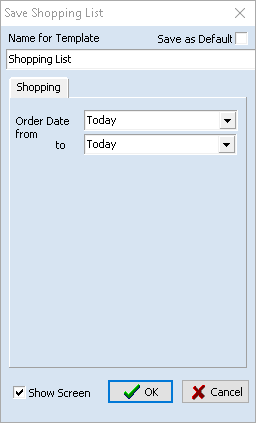
- Type a name for your template, then select Save as Default if this will be your default template for this module. We recommend choosing a descriptive name that clearly indicates the template's purpose to all users of Robot or Template Wizard.
- In the Order date boxes, click the From and To options that describe the range over which you want Robot to shop. This is likely to be Today for both lists.
- Select Show screen so you get feedback when using the template in Template Wizard. Robot ignores this setting.
- Click OK.
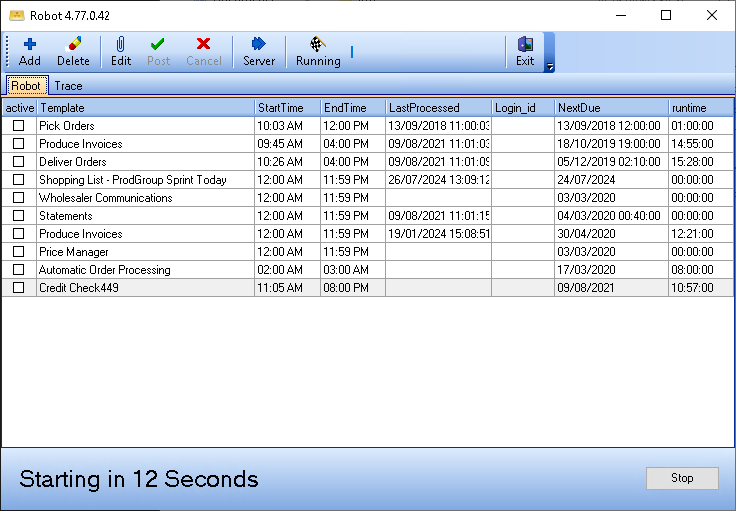
- Open Robot. There is a delay before Robot starts. Click Stop to stop Robot from automatically running. When Robot is running, the button in the toolbar is selected. If it is running, click Running to stop Robot.
-
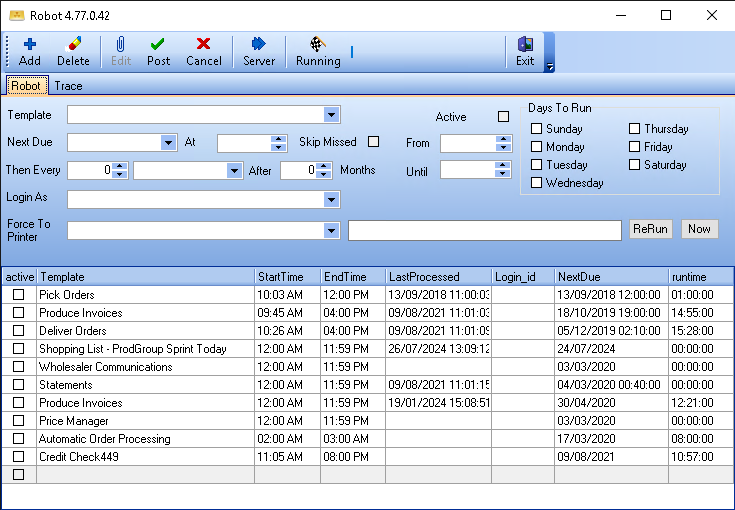
Click Add. A new line is added to the list of templates and the boxes under the Robot tab are ready for you to complete.
- In the Template list, select the stored template.
Note: If there is an ellipsis, rather than a drop-down arrow, you are using an old configuration of Robot which uses files, not templates stored in your database. These files should not be edited manually, only created from Horizon.
- Select Active. This puts the schedule in use.
- In the Next due box, use the calendar picker to select the next date the schedule will run.
- In the At box, type the time you want it to run.
- When Robot runs, the number of times a schedule should run is logged, so if Robot is stopped, and started again at a later time, all missing schedules will be run. Select Skip missed to start the schedule from this point.
- Set the frequency which the schedule will run, with the sentence:
- Then every – the frequency
- Unit of time, or day.
- After – the number of months that you want the schedule to be delayed. To run the schedule with no delay, use 0 months.
- Next, set the time window in which it is acceptable for the template to run. This ensures that if Robot is restarted, tasks which should wait until the next window are not started:
- In the From box, type the time the template can start to run. It's suggested that you set a minute or two before the At time.
- In the Until box, type the time after which it is not acceptable for the template to run.
- In the Login as box, select the company contact Robot will run the template as. It is usual to add a contact called Robot for all Robot templates. This makes it easier for you to problem solve any issues. Super users can view logs of Robot activity.
- Under the Days to run group, select which days the template will run.
- In the toolbar, click Post.
- Click Running to restart Robot.


