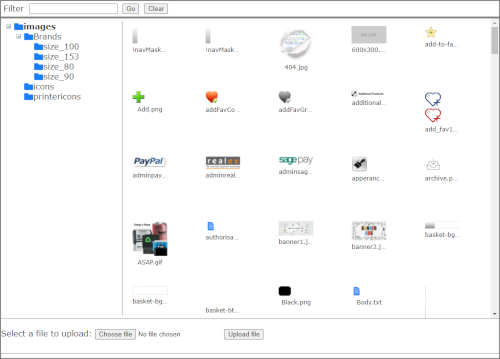
Deleting Images
To delete files uploaded to your images folders:
- Click Admin > HorizonWeb Designer > File Manager. The File Manager window opens.
Note: If you are using the updated File Manager for the first time, you may need to in Chrome, load the current page, ignoring cached content (Shift+F5) (external link) or the equivalent action in your browser.
- Click the left-hand pane, click an image folder. Most images are located in images with special images in their sub-folders.
- Click an image folder.
- Click the image to select it. A red border surrounds the image.
- Click Delete.
Downloading Images
To download an image from the images folder:
- Click Admin > HorizonWeb Designer > File Manager. The File Manager window opens.
- Click the left-hand pane, click an image folder. Most images are located in images with special images in their sub-folders.
- Right-click the thumbnail size image in the File Manager and from the context menu click Open image in new tab. In the new tab the image is shown at actual size.
- Right-click the file, and from the context menu, click Save image as…. Select a location (typically your Downloads folder) and click Save.
Note: There are other possible addresses for images displayed on your site, for example, those displayed because you have imported enhanced data, or loaded image URLs. Using the same method, but on your site, rather than the File Manager, look at the address of the image. If it starts https://<my HorizonWeb site address>/images then it is an image you can manage with File Manager. If it is something else, then the image is loaded into the browser from that location, and its address has been imported into Horizon.
Renaming Images
To rename an image, download the image, delete the original and upload a new one with the correct name.


