Setting Up a Green Products Group
If you create a user defined product group called Green, all assigned products are included in your HorizonWeb GreenProducts page.
Note: A user defined product group is not the same as a group, as in Ranges, Groups and Subgroups.
Upload a "Green" Icon to HorizonWeb
- Create an image to label "green" products. It must be a 25 × 25 px gif file called green.gif.
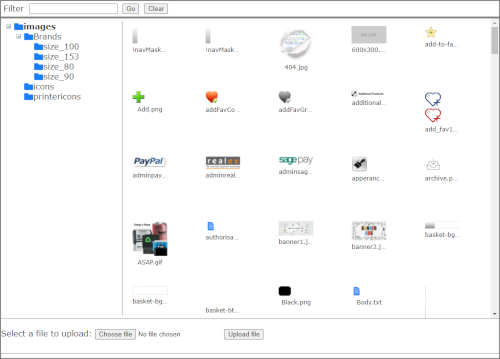
- In HorizonWeb, click Admin > HorizonWeb Designer > File Manager. The File Manager window opens.
- Click the left-hand pane, click the images folder.
- Click Choose file… . The Open window opens.
- Browse to the green.gif file. Click the file to select it, then click Open.
- The file-name is displayed. Click Upload file.
- The files are sorted by alphabetical order. To view the file in a browser, use the address: <site address>/images/green.gif .
Create a Green Products User-Defined Group
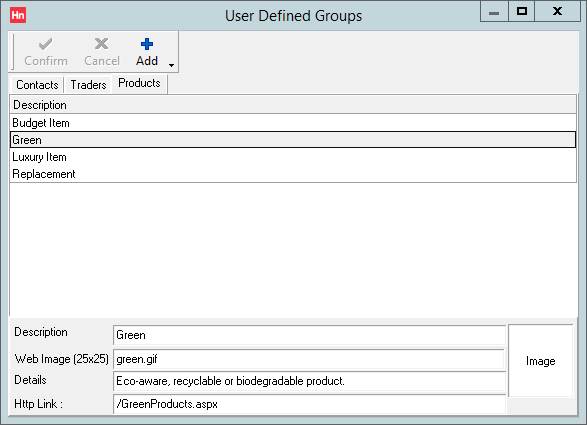
- In Horizon, in the Set-up menu, click User-defined groups.
- Click the Products tab.
- In the User-defined groups toolbar, click Add. A new line is added to the grid.
- Below the grid, complete:
- Description – Green
- Web image – green.gif
- Details – This message is displayed on HorizonWeb when customers hover over the "Green" icon.
- HTTP link – link to a page when the green.gif icon is clicked. You could link to a page describing your company's sustainability policy. Alternatively, to link to your Green Products page, type: /GreenProducts.aspx . This is a relative link (external link) using your HorizonWeb site's base URL, and will open in a new browser tab.
- Load image – do not load an image. The image used is the green.gif file you uploaded in HorizonWeb.
- Click Confirm.
Adding Products to a Product Group
You can add or clear several products from a product group from Stock Card > Browse.
- In the Stock menu, click Products. The Stock Card opens.
- Browse for the products you want to add to your group. For example, you could search for "remanufactured" in the product description.
- Click the Groups tab, at the top of the Browse tab on the right-hand side.
- Select the groups to which you want to assign the product, for example Green.
- Click in the product list and use extended selection to select the products you want to update. For example, press CTRL+A to select all products.
- Below the product list, click Set Groups. A progress bar is displayed.
Clearing products from a group is achieved in a similar way, this time clicking Clear Groups.
You can also add a single product to a product group.


