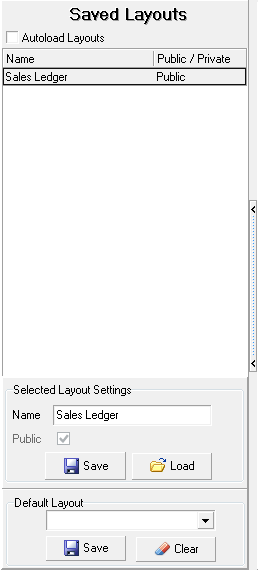
Saved layouts allow you to configure a daybook and save that layout to use later.
The Saved Layouts panel is hidden with a splitter to the left of the list of transactions. Click the splitter to show the panel and again to hide it.
Creating a Layout
A layout is an arrangement of columns on a daybook. You can have as many, or as few, columns as is useful in a layout. The power of layouts is to be able to quickly switch between those layouts to get a different picture of your transactions. In this example, the Sales Ledger is used, but Saved Layouts can be used with any daybook.
- On the Sales menu, click Ledger. The sales ledger daybook opens.
- To the left of the transaction list, click the narrow vertical bar with arrows pointing to the left. This is a splitter. The Saved Layouts pane is shown.
- Change the layout:
- Reposition columns by using drag-and-drop to move them.
- To remove a column, right-click the column title and from the context menu, click Remove This Column.
- To add a column:
- right-click a column title, and from the context click Field Chooser. The Customization window opens.
- drag the column name to the column header row.
- In the Selected Layout Settings group, in the Name box, type a name for your layout.
- Select Public if you want other users to be able to use the layout.
- Click Save. The layout is added to the list.
Using Autoload to Quickly Change Layouts
- Create more than one layout.
- Select Autoload Layouts.
- Click each layout in turn. The layout will load..


