You can use Horizon and HorizonWeb to send electronic documents as emails. You must first enter details of the servers you send emails from, and receive emails at.
Configure Horizon to use a Mail Server
These are the email details used to email directly out of Horizon and HorizonWeb
- Click Set-up > Company. The Company Set-up window opens.
- Click the Settings tab > Email tab > Email Settings tab.
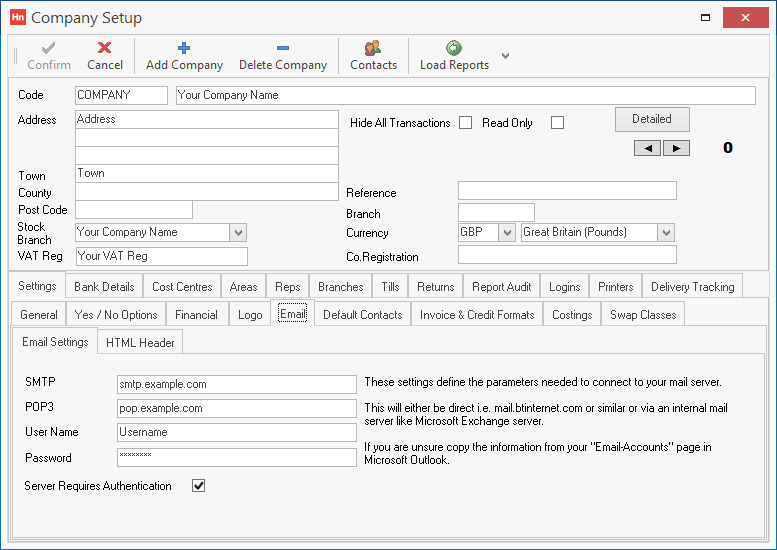
- Type the following details:
- SMTP – the address of the mail server used to send emails
- POP3 – the address of the incoming mail server.
Note: It is usual to leave this box blank. Horizon will only use this setting to import orders via email, which is a deprecated feature.
- Username (if required)
- Password (if required)
- SMTP port – the port used by the mail server. Please consult your mail server provider's documentation for details.
- If the SMTP server requires a username and password, select Server requires authentication.
- Email log – select to log email information in a separate log for each user. This is recommended because two or more users are not trying to update logs at the same time. Logs are cleared down by the Orders and Receipts Import Service after 90 days.
- Click Confirm.
Note: Horizon supports SMTP servers which require authentication with a username and password. Please refer to your email provider's instructions as to which credentials and which port should be used.
Note: Horizon does not support Office 365 multi-factor authentication (external link). You may need to ask your administrator to turn it off.
- Type the following details: source (external link)
- SMTP – smtp.office365.com
- Username – name@example.com . This is the email address you want to send emails from.
- Password – password for the user above.
- SMTP Port – 587
- Select Server required authentication.
- Click Confirm.
- Click the Logins tab.
- Select the user you want to use to send emails.
- In the Email password box, type the password for the Office 365 email address you are sending from.
- Click Confirm.
- In the toolbar, click Contacts. The Contacts for [Company Name] window opens.
- Select the contact you want to use to send emails.
- In the Email box, type the email address of the contact.
- Click Confirm.
If you want a copy of the email sent, rules need to be set up to move the sent items into a location. Office 365 SMTP servers are being used as a relay. The Outlook 365 client isn't the originator of the email – Horizon is – so the rule needs to bcc (blind carbon copy) emails back to the user.
- In Office 365, open Exchange Admin Center (EAC), then in Microsoft's support article, "Scenario: Conditional mail routing" follow step 2 to create a mail flow rule (external link).
- Create a rule:
- Apply this rule if… The sender is … [The user with the Username above]
- Do the following… Bcc the message to… [The user with the Username above]
- You can then create a further rule to take advantage of Office 365's retention policies (external link).
Note: Our Support Team cannot offer support on using Office 365. For help with Microsoft products, please contact your IT provider.
An App password needs to be set up to give Horizon permission to access your Gmail account. For further details, please see Google Account Help – Sign in with App Passwords (external link).


